How to Manually Install a Chrome Extension
If you ever need to manually install a Chrome extension, don’t worry, it’s a simple process. Just follow these easy steps, and you’ll have your extension ready to use in no time.
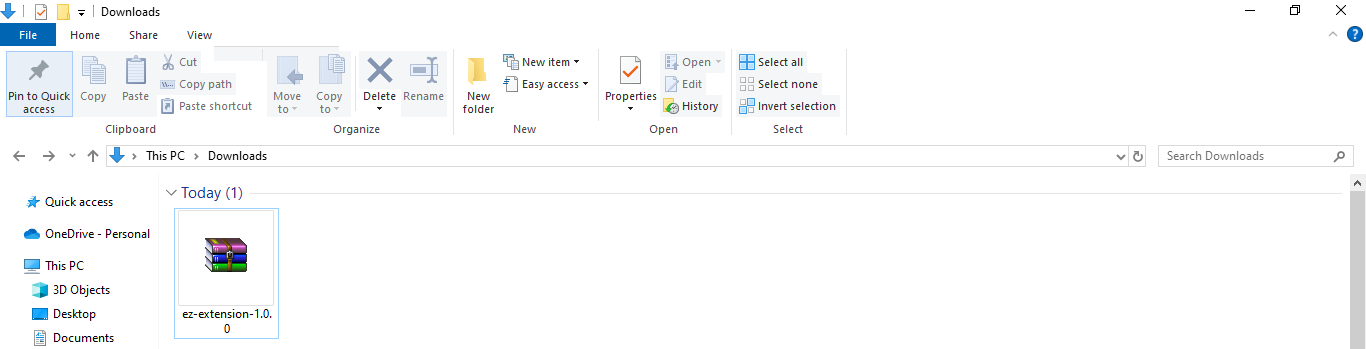
Step 1: Download the Extension file
To download the extension, please click the link below. Save the ZIP file in a folder on your computer.
Download extensione.g. Extracted File - C:\downloads\ez-extension-1.0.0.rar
Note: This extension is supported only on Google Chrome for Windows.
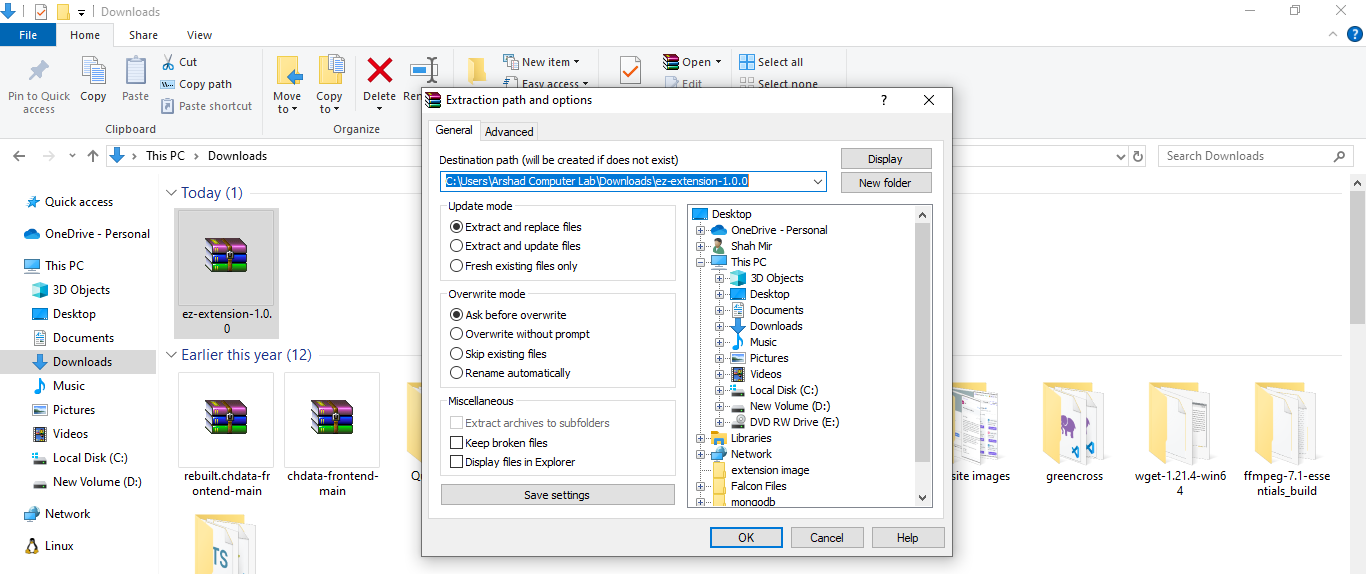
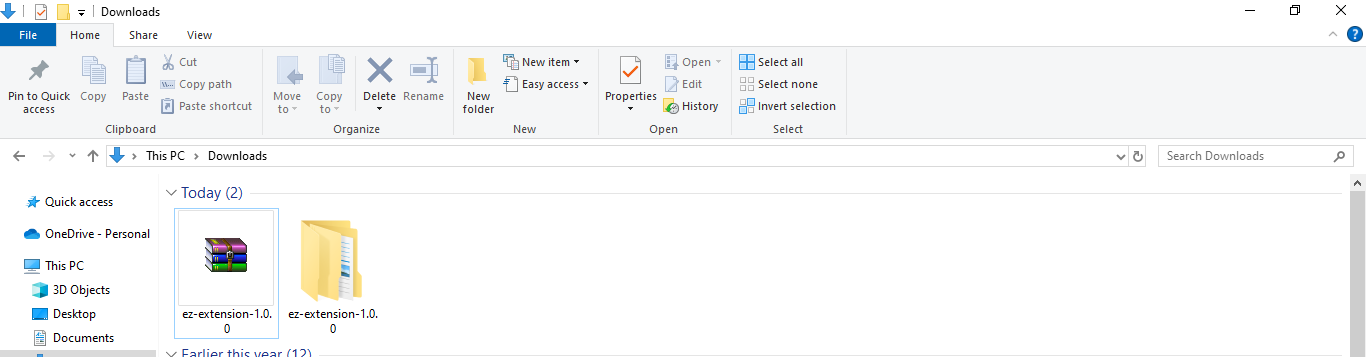
Step 2: Extract the downloaded contents
After downloading the Chrome Extension (ZIP file ), extract its contents into a new folder using the same name as the ZIP file.
e.g. Extracted Folder - C:\downloads\ez-extension-1.0.0.rar
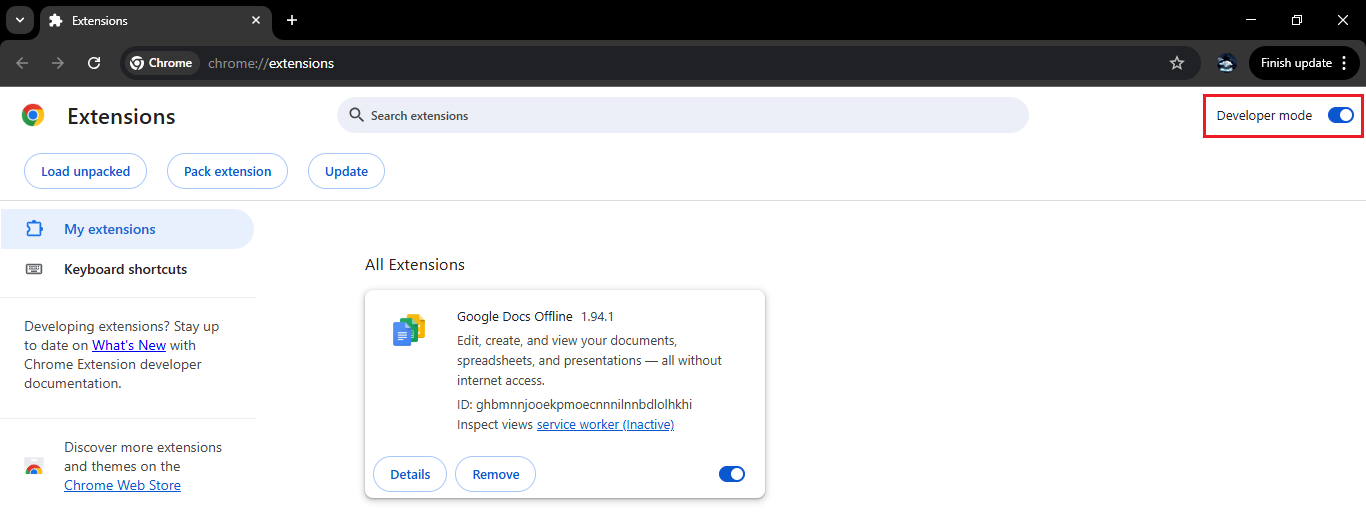
Step 3: Open Chrome Extension Setting Page
In the address bar of Google Chrome, type chrome://extensions and open the Chrome Extension Page.
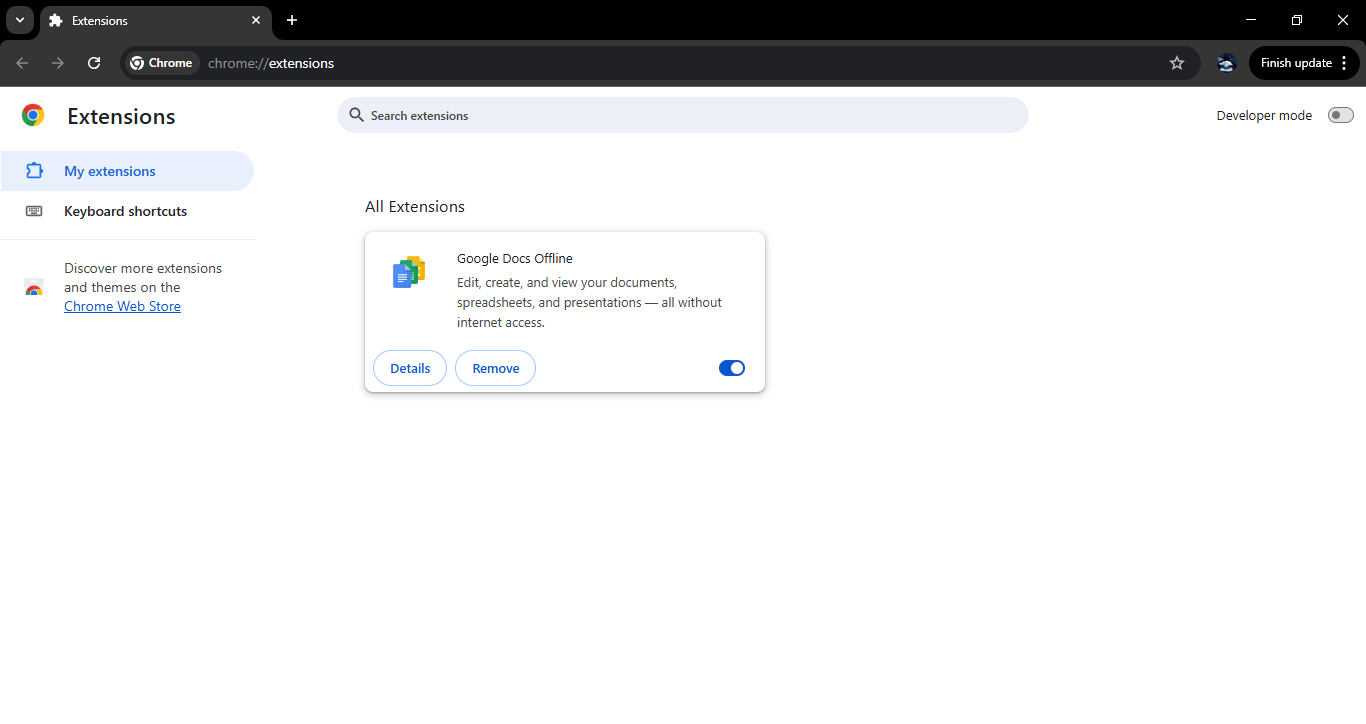
Step 4: Enable Developer Mode
Once you're on the Chrome Extensions page, look in the top-right corner for the Developer mode toggle. Click it to enable Developer mode.
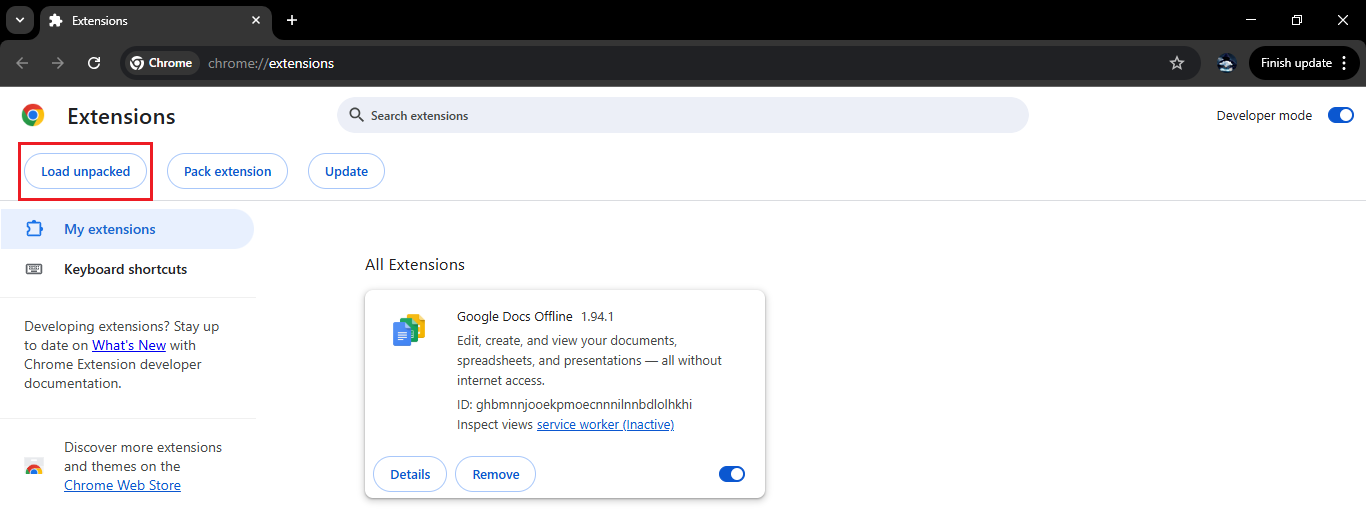
Step 5: Load the Unpacked Extension
"After enabling Developer mode, a new menu will appear with options “Load unpacked” , Click on Load unpacked to proceed."
``
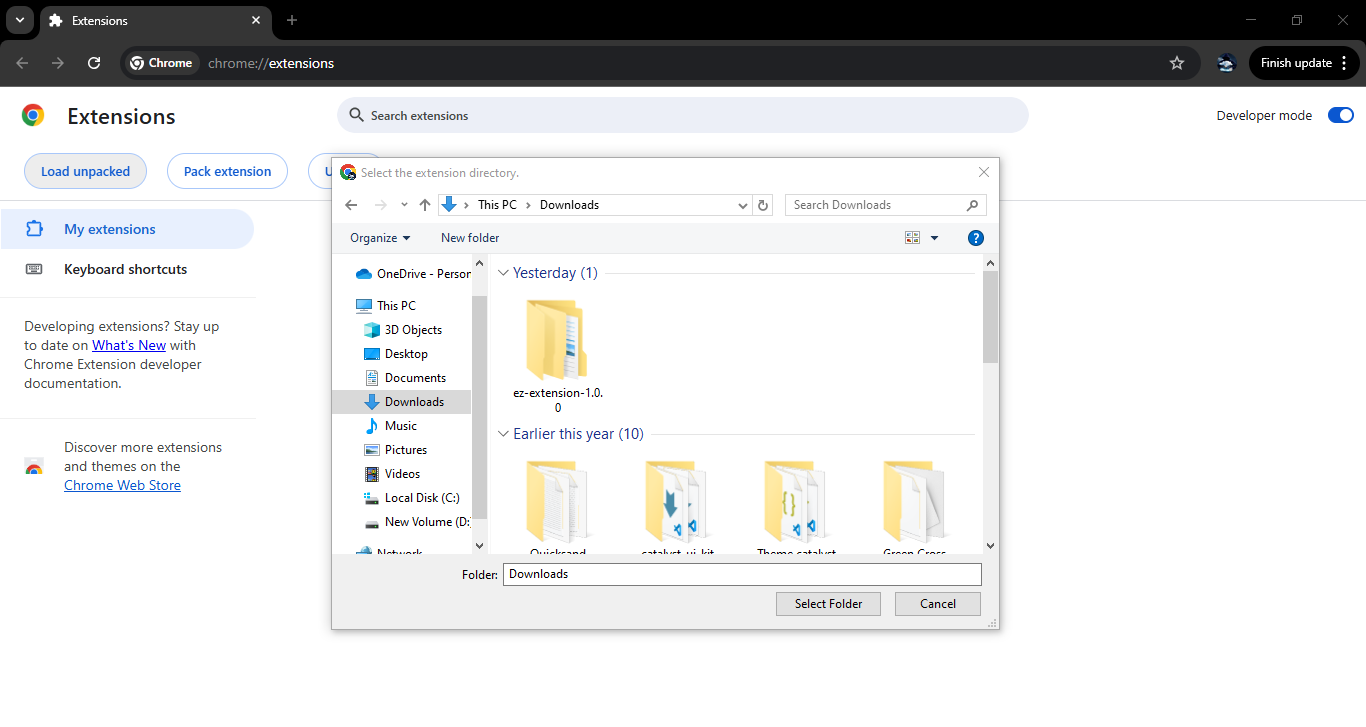
Step 6: Select the Extension Folder
Once the pop-up opens upon clicking Load unpacked, select the extension extracted directory and click on the “Select Folder” button.
e.g Extracted Folder - C:\downloads\ez-extension-1.0.0
Step 7: Confirm and Install
Once you’ve selected the extension folder, Chrome will begin installing it. Confirm any prompts if needed, and wait for the installation to finish.